Beginner's Guide to Sourdough Baking
- Mar 25, 2020
- 8 min read
Updated: May 14, 2020
I first received the gift of a sourdough starter in 2018, at a workshop in San Francisco. It's one of those magical things that keeps giving. A living, breathing, bubbly being you can use again and again for years. That workshop got me started on my journey of sourdough bread baking.
It took me multiple attempts to get my first loaves of sourdough right. In the process, I hunted everywhere for a beginner's guide that would teach me the essentials, without overwhelming me with sourdough jargon and artisan breadspeak. I noted down bits and pieces of different instructions and advice over time to derive my own take on the process. There were no shortcuts and the varied steps required over an 18-24 hour period made it easy for missteps resulting in a less than perfect loaf.
Fast forward to March 2020. I found myself in the midst of the covid-19 lockdown in the US, with no easy access to fresh bread and plenty of time indoors. I located my forgotten jar of sourdough starter in the back of the fridge, nursed it back to health and started baking again.
Here's my attempt to pass it on and provide an easy to digest (pun intended) beginner's guide to baking your first sourdough bread. I've also included plenty of pictures and videos to guide you along the process. If you prefer to watch the process, head straight to this video.
Let's start with the essentials to make 1 sourdough loaf:
1. Sourdough starter (15g) - buy one or make your own
2. All-purpose or bread flour (350g) - I prefer King Arthur's organic flour
3. Whole wheat flour (205g) - I've found that a mix of all-purpose flour and whole wheat works best for me, but you can also choose to use just all-purpose flour for the entire loaf.
3. Warm water at 80ºF, which means you need a thermometer to measure
4. Bannetons - special baker baskets which help maintain the shape of the loaf as it proofs
5. Bread lame (sharp razor) to score the bread before baking - I love the one as part of this set.
6. Dutch Oven - essential to steam the bread at a high temperature for maximum rise
7. Kitchen scale - the accuracy of ingredients does matter for sourdough loaves
8. Dough scraper - to easily handle and transfer the dough from one surface to another
(I've included links above to the items I recommend. More details on essential tools in this post)
2-3 days before: Starter Prep

If your starter was stored in the fridge, take it out 2-3 days before you want to start baking. Feed it once or twice daily to restore it to its bubbly self. Ripe starters should show some bubbles on its surface and look a little uneven.
You only need 15g of it to start with, so you don't have to feed your whole jar of starter. Just take out what you need and feed it in a covered bowl.
Also read: How to maintain a sourdough starter

Float test: drop 1/4 teaspoon of your starter into a glass of water. If it floats, it's ready! If it sinks, feed your starter again and wait another 1-2 hours before testing. If your starter still keeps sinking, you might need to wait another 12 hours for it to fully recover, especially if it has not been properly fed for a long time. If you want to go ahead to bake without a mature starter, it will still work, but your loaves are likely to be flatter and denser than you would like because it may not generate enough gases to rise properly.
Stage 1: Leaven Prep
The night before you intend to bake your loaf, mix the following in a small bowl with a spoon/whisk and leave it covered on the counter overnight
15g - sourdough starter
55g - whole wheat flour
58g - water at 75 - 80ºF (try to use filtered water if you can)
Stage 2: Autolyse
The next day, the leaven should look slightly risen.

In a large mixing bowl, add the following step by step:
a) 125g leaven
b) 370g water at 75-80ºF. Mix using a spoon or your hands.
c) Next, add in 350g all-purpose / bread flour and 150g whole wheat flour. Mix till all dry bits of flour are incorporated into the dough which will be wet and sticky at this point.
Cover your bowl with a kitchen towel and let it sit for 30 minutes.


After 30 minutes, add 10g salt and another 25g of 80F water to the bowl. Use your hands this time to ensure the salt is spread evenly throughout your dough. The dough will still be very wet and sticky at this stage.
To help the dough build strength and structure, we will start stretching it for the next few hours. To begin, reach under the dough in your bowl and pull the side up and over onto itself. Repeat 8-10 times around all sides, turning your bowl gradually. Cover and let it sit for 30 minutes.
Stage 3: Bulk Fermentation - Stretch and Folds
In this stage, we want to stretch the dough at even intervals to build the gluten bonds. Every 30-45 minutes, stretch your dough on all 4 sides by pulling it up and over onto itself. Pull as high as your dough will go without breaking.
Assuming you started the first stretch at 10am, do it every 30mins at 1030am, 11am, 1130am. After that, cover and let the dough rest for 2 hours.

1st stretch and fold - the dough is wet and sticky at this stage
2nd stretch and fold - as you can see the texture of the dough is significantly different after just 30 mins.
4th stretch and fold - the dough is much stronger at the end
Tip: Window Pane check - to know if your dough is ready, try and spread a small section of it with your fingers till it becomes a thin membrane without breaking. If you can see light through the membrane, it passes the window pane test, which means the gluten is now well developed and strong! See video here at 4:57 for visual example
Stage 4: Pre-Shape
After a good stretch and rest, your dough would have risen visibly, with some air pockets beneath the dough. Shaping of your dough is important to build surface tension and ensure a good rise in your bread.

Dust a working surface with flour and gently roll your dough out of your bowl, using a scraper or spatula to help if needed. Pull the sides up over and onto the top. Imagine wrapping a present (or just watch the video below). Then flip it over so the seam side is down.
Hug the dough gently with your hands and start spinning it around like you are molding a pottery bowl, tucking the sides into the bottom a little as you go. This gently creates tension on the dough surface. If the dough is too sticky, use a scraper to help you tuck and spin. Refer to the video below to see how pre-shaping is done.
Rest it on your work surface for 30 minutes. At this stage, your dough will feel moist but should no longer stick to your dry fingers. If your environment is particularly warm, dry or humid, cover them up with large bowls.

Stage 5: Final Shaping
Prepare your bannetons by dusting flour liberally on them to prevent your dough from sticking. Using more flour is always better if your dough feels slightly sticky.
Flip over one of the boules of dough with your hand and scraper. Pinch corners of the dough, pull it up and press it into the center. Try not to burst any of air bubbles in the dough as you are doing this, but continue to pull in the edges from all corners to the center of the dough. Once you have completed all the edges, pick up the edge closest to you and gently roll the dough onto itself until the seam side is down. It's a little hard to visualize this braiding action, so refer to the video below.
Afterwards, spin the dough around again on the work surface to shape it into a round boule and build tension.
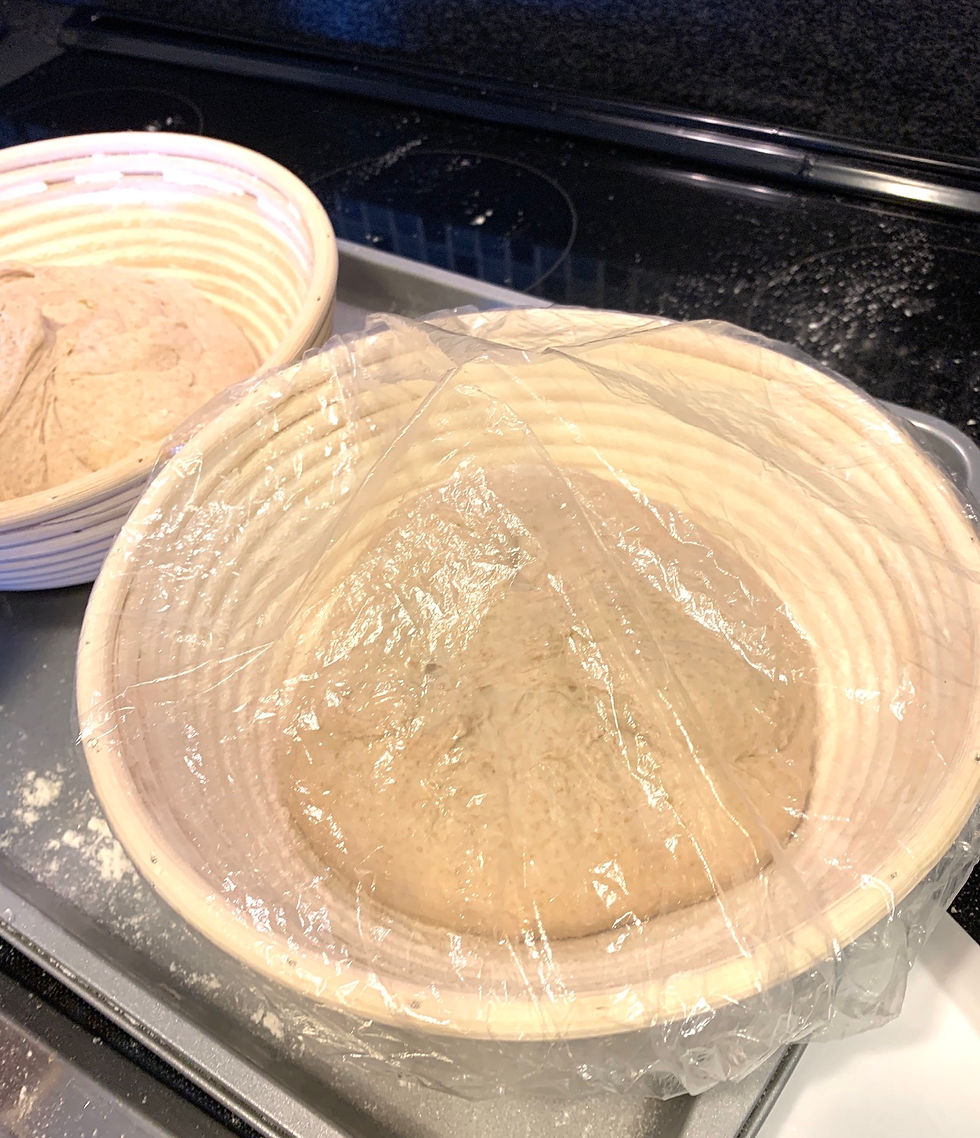
Stage 6: Proof
Flip the boule gently onto your palm with the help of the scraper. Place it into your floured bannetons, seam side up. The banneton will help to hold the shape of the dough as it proofs. Cover with plastic bags to prevent moisture from escaping. I learned a nifty trick of using plastic shower caps (yes the kind you find in hotels) to cover the bowls.
Pop your bannetons into the fridge and chill for at least 2-3 hours before baking. You can also let them proof in the fridge 16-18 hours overnight, so you can bake them in the morning. Typically, the longer the proofing time, the better the flavor and 'airiness' of the loaf.

Stage 7: Score & bake
Place your Dutch oven into the oven and preheat oven to 500ºF for at least 30 minutes.

Prepare a piece of parchment paper slightly bigger than the base of your Dutch oven. Remove your banneton from the fridge and remove the cover. Place the parchment on top of the banneton. Put a firm surface on top e.g. a cutting board or placemat. Flip the setup over and place it on a flat surface. Lift the banneton slowly while it gently releases the dough onto the parchment paper.
Using a lame or sharp razor or knife, quickly slice across the dough at a 45 degrees angle. The dough should start to tear and open up gently. Make swift, decisive cuts about 1/2 inch deep.
Remove your preheated Dutch oven and place it on your countertop. Warning: 500ºF is really hot, so use extra thick gloves or padding to handle your Dutch oven to avoid burns.
Pick up the parchment paper and gently lower it into the Dutch oven, taking care not to touch any of the sides to avoid burning yourself. Some people spray the top of their dough with some water, or add an ice cube into the Dutch oven to introduce more steam during this stage, but it's entirely optional.

Cover your Dutch Oven and return it to the oven. Lower the heat to 450ºF and bake for 20-25 mins.
During this time, the bread will rise rapidly as the gases trapped inside expand and the yeast has a final burst of activity (also known as “ovenspring“). The enclosed environment of the Dutch Oven allows steaming which keeps the crust soft and allows it to continue rising. Tip: The longer you bake with the lid covered, the softer your crust will be. So if you like a crunchier crust like me, bake for just 25 mins.
Remove the lid and bake for another 20mins without the cover to brown the crust. Watch your loaf at this stage as your oven might run a little hot. If your bread gets too brown, you might want to drape a piece of parchment paper on top to protect it as it bakes.
The bread is ready when you tap on the bottom and it sounds hollow.
Stage 8: Cool off & enjoy!
Lift your sourdough out of the Dutch oven and leave it out on a wire rack for at least 45mins. Don't miss this step! It's really tempting to slice into freshly baked bread as the smell wafts through your kitchen, but slicing it too early will cause the crust to harden too much and the inside to become denser and 'gummy'. Be patient!

Take some commemorative shots and enjoy your delicious loaf!
If it didn’t quite turn out the way you want it to on your first try, don’t be discouraged and try again!
Leave your questions and comments below and I can help troubleshoot where needed!
Comments